
Don’t we all know this: You quickly take a snapshot on the beach with a perfect situation, beautiful colors and a funny face that you will never be able to reproduce. 🙁
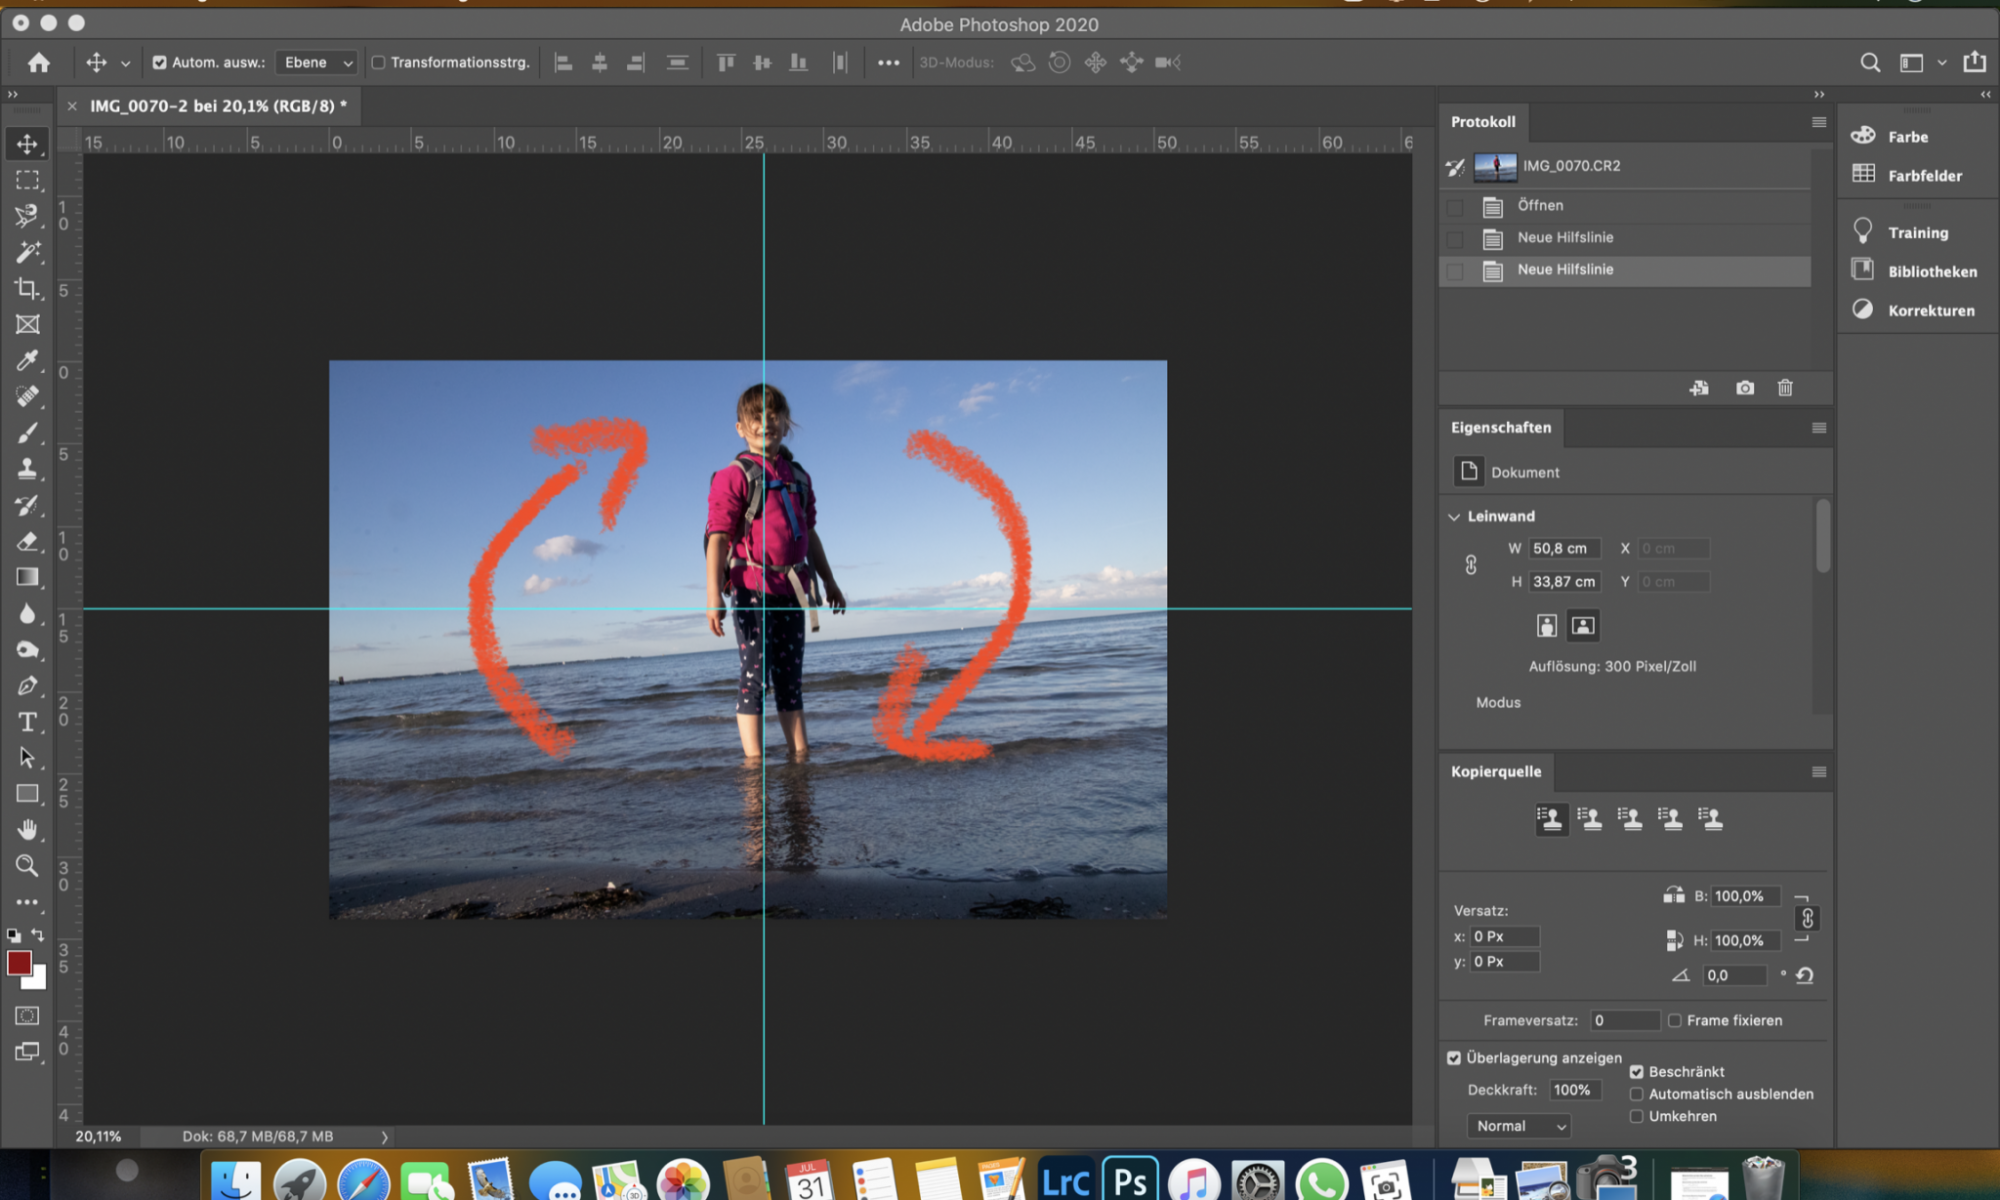
Only later, you see that you did not properly align your camera and the horizon is not really „horizontal“ as it should be.
You can easily check the tilt angle using the added helper lines.
Now, being old-fashioned, you could open the image in photoshop, copy the layer, select the main motive, cut it out, copy it to the clipboard, rotate the background layer, insert the cut out main motive again, adjust the missing parts with the repair brush and save the image again…
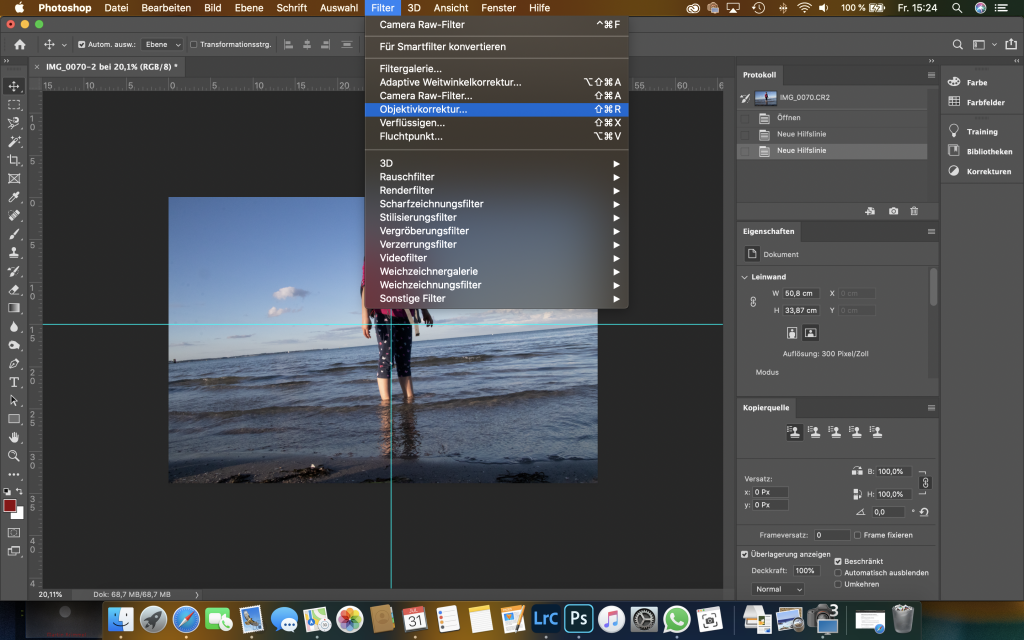
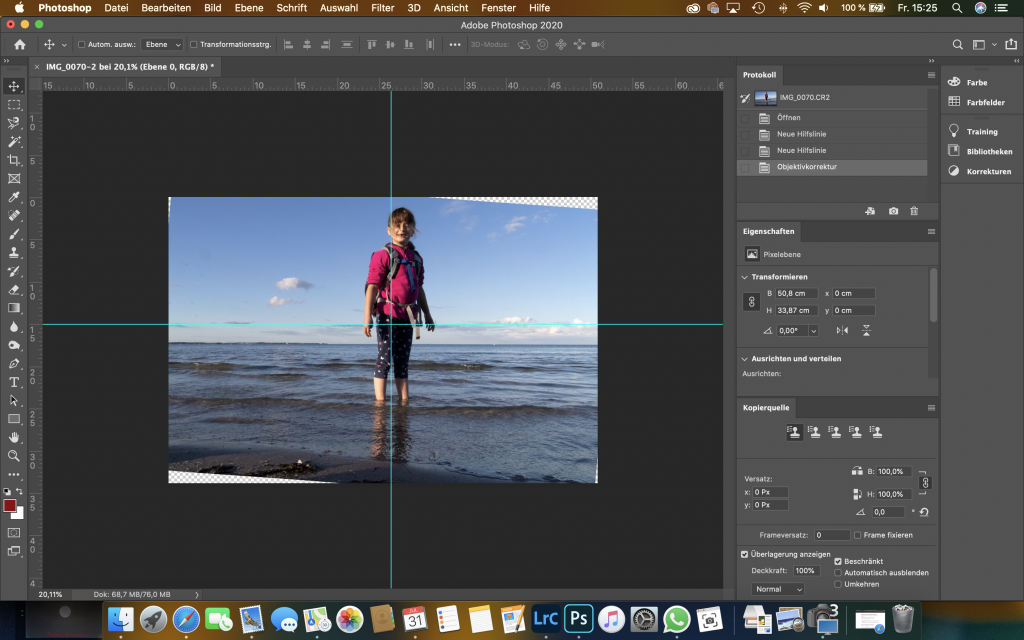
However, there is a much easier way: the lens correction filter (German: „Objektivkorrektur“).
- Open the lens correction filter from the „Filter“ menu.
2. Select the „Level“ tool on the left.
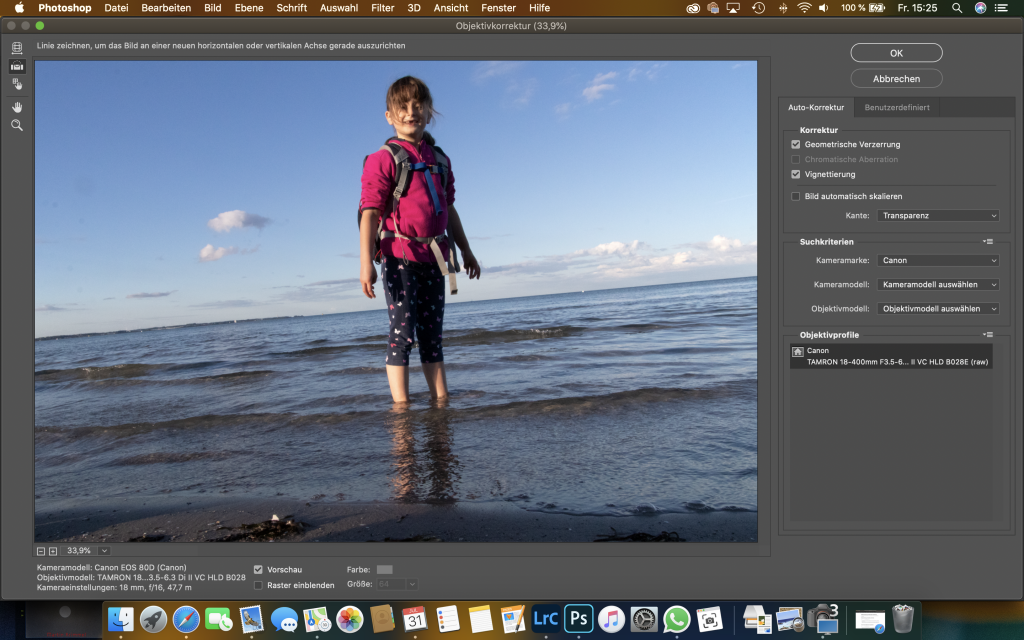
3. Draw a line across a truly horizontal part of your image.

4. Click OK.
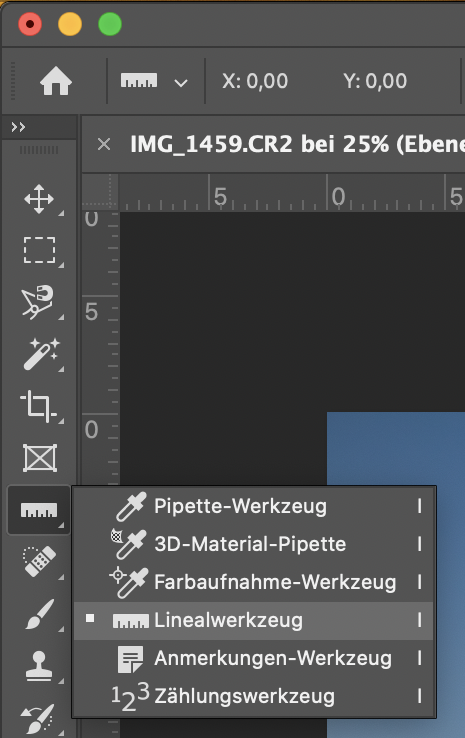
Note aside: Alternatively, you can also use the Ruler tool with Straighten layer.
Only the blank edges now need to be filled or cut away. I want to fill them using the Repair tool.
5. Select the Repair tool on the left.
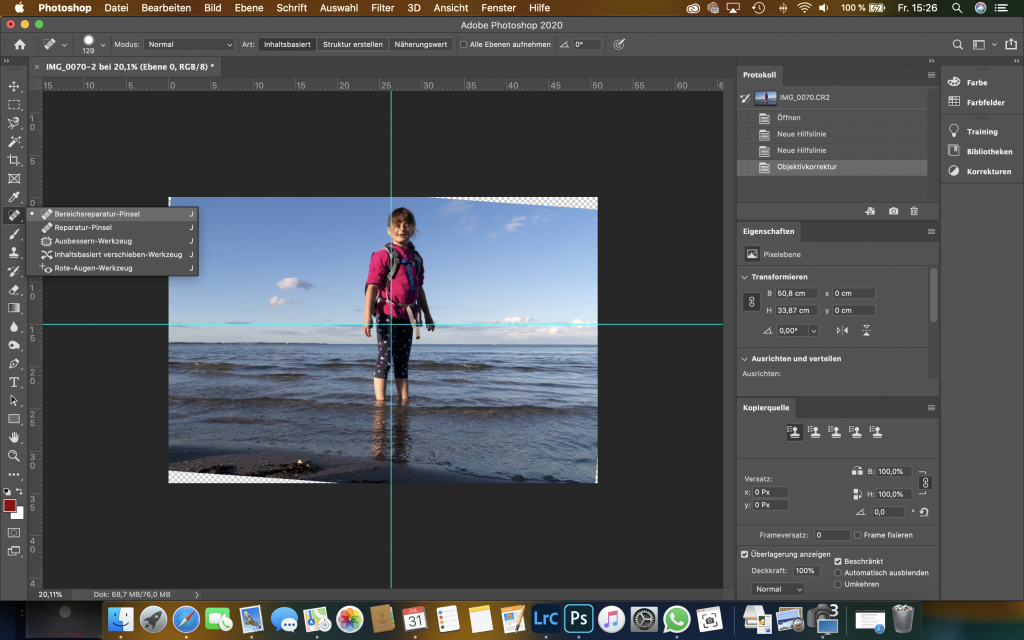

6. Use the brush to draw in the areas to be repaired.
Photoshop will fill the missing bits with matching content.
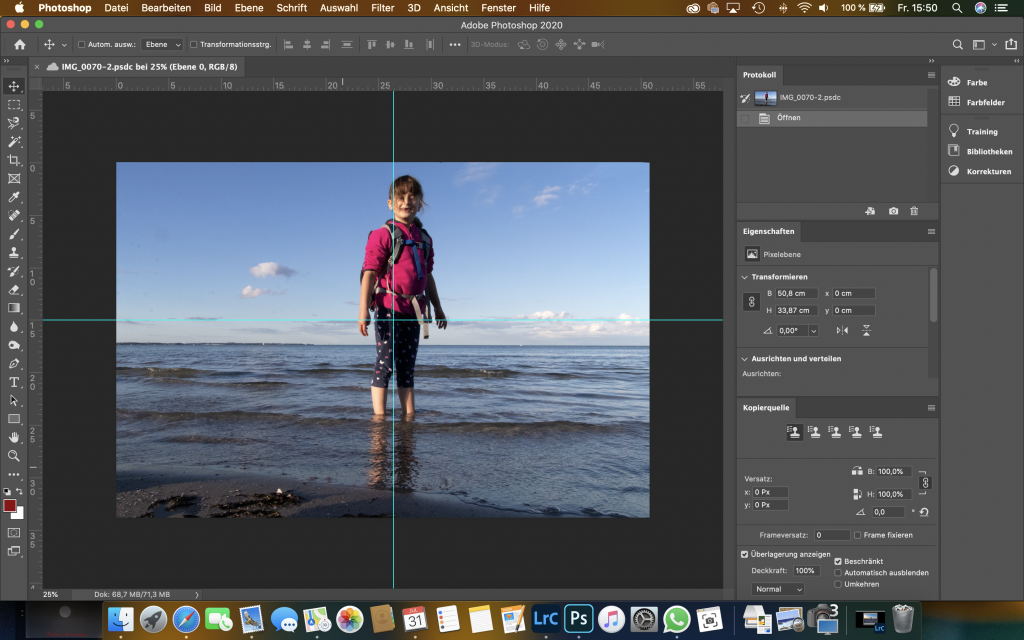
The result is stunning… in less than 5 minutes‘ work.
Your holiday snap is perfectly in shape now and you can continue to relax. 😀